Menu
Log in


Canberra Region Feltmakers

Log in

Felt ideas

  • 27 Jul 2021 11:28 AM | Anonymous member (Administrator)

    A promotional video released just prior to the launch of the exhibition featuring a range of quirky felted finger puppets. Go to this playlist of short videos to see these puppets in action.

  • 27 Jul 2021 11:22 AM | Anonymous member (Administrator)

    A promotional video for our collaborative online exhibition featuring a range of quirky felted finger puppets. Go to this playlist of short videos to see these puppets in action.

  • 27 Jul 2021 11:20 AM | Anonymous member (Administrator)

    In this video you will catch a glimpse of the wonderful works created as a result of our inaugural Mystery Canfelt Along (Autumn 2021)

  • 25 Apr 2020 10:24 AM | Anonymous member (Administrator)

    Making postcards from felt is a great excuse to try all sorts of felting techniques. You can layer up wool colours, fabric scraps, fibre and printing or stencils to create your postcard picture.

    Here is one way to make a 15cm x 10cm felted postcard.

    Lay out two layers of wool tops to cover an area approximately 22cm x 15cm. This allows for shrinkage - you should end up with a well felted postcard by the time you have shrunk it down to the final size. Using a plain coloured wool will make a good base to write on the back of the postcard later.

    Add  coloured wool, fibres and fabric scraps of your choice to build up your postcard 'picture'.

    Cover the layout with some netting and wet down with soapy water. A plastic bag or a small piece of bubble wrap can be used on the surface to press the water into the wool.

    Blotting the excess water with a towel will make it easy to remove the netting.

    Add an optional layer of fine fabric on top. Here a piece of hand painted silk organza has been used. Light weight fabrics made from natural fibres will generally integrate best into the felt.

    Wet this down and gently smooth the fabric onto the wool base underneath (use the netting and plastic bag/bubble wrap again).

    Begin felting. Start gently and keep going until the felt has shrunk down to 15cm x 10cm. You can trim any uneven edges with scissors if you wish and then felt a bit more to finish the cut edges.

    Rinse out the finished felt in clean water to remove the soap and dry the felt flat.

    When your postcard is dry you can 'write' the details on the back. This one was done by painting fabric paint thinned with textile medium using a small brush but there are many other options.


  • 13 Feb 2020 10:24 PM | Anonymous member (Administrator)

    Follow these steps with us to make a felt bowl.


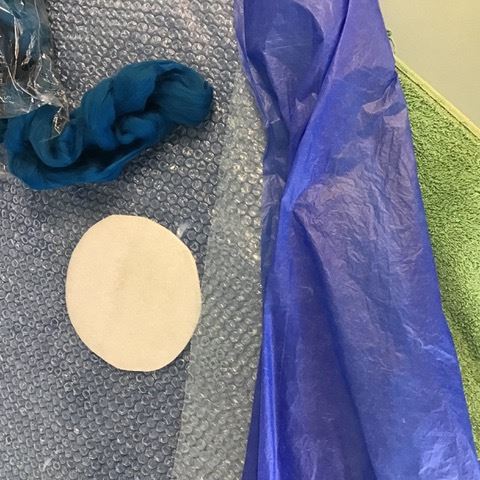
    We started with a circle resist 17cm across, some wool tops, some decorative fibre and some bubble wrap.

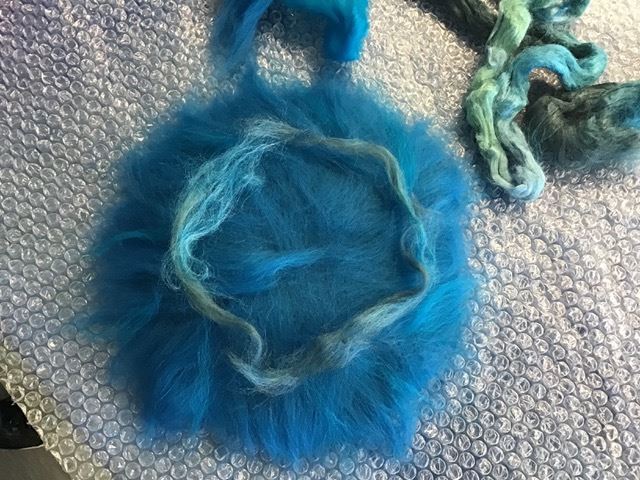
    First lay a layer of wool over the top of the resist.

    Add a second layer of wool running in a different direction.

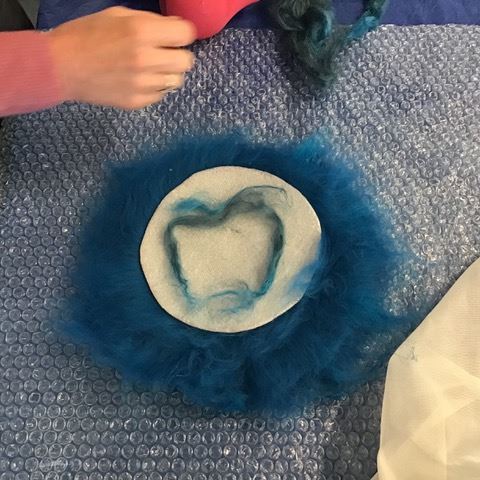
    We added some surface decorations

    Wet and flip the wool and resist.

    We added some sneaky decorations on the inside.

    Fold the wool around the edges of the resist.

    Here we have the wool all folded in around the resist and ready to finish wetting.

    Cover with netting and rub down the surface. We have used a lid from a plastic container.

    Work the edges to make them neat.

    Roll up in the bubble wrap and then roll back and forwards.

    Cut a small hole in one side.

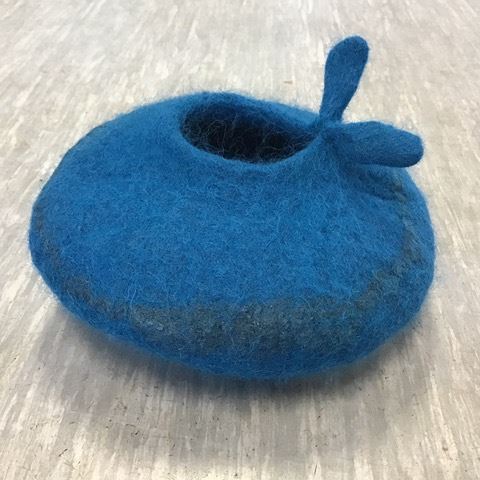
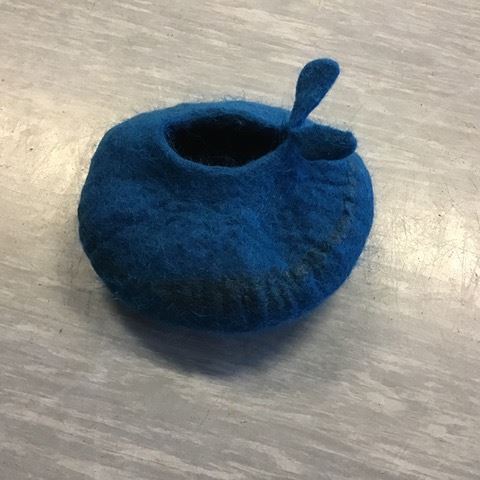
    Pull out the resist and massage the felt to shape up the pot. Our shaping resulted in a surprise whale's tail (we were at the beach).

    Stuff the pot with plastic bags and leave to dry.

    And there you have it! A pot with a whale tail decoration.


  • 1 Feb 2020 12:43 AM | Anonymous member (Administrator)

    This is a high speed demonstration. We run workshops to teach people how to make felt.


Canberra Region Feltmakers Inc

Meetings:  Scout Hall, Kett Street Kambah, ACT

(next door to The Burns Club)

Post:  PO Box 455 Curtin ACT 2605

ABN: 16 718 242 055

Powered by Wild Apricot Membership Software